The gravel bike is a relatively new concept as it is a blend of a road and cyclocross bike with some characteristics of a hardtail cross country bike. As such this bike can handle fast/smooth single track, lung-busting climbs, moderate/aggressive descents, all-day epics and much more.
The intent of the gravel bike geometry is to create a rider position that is comfortable for an all-day epic and aggressive enough to hammer hard on dirt roads, single track, and even your local CX race.
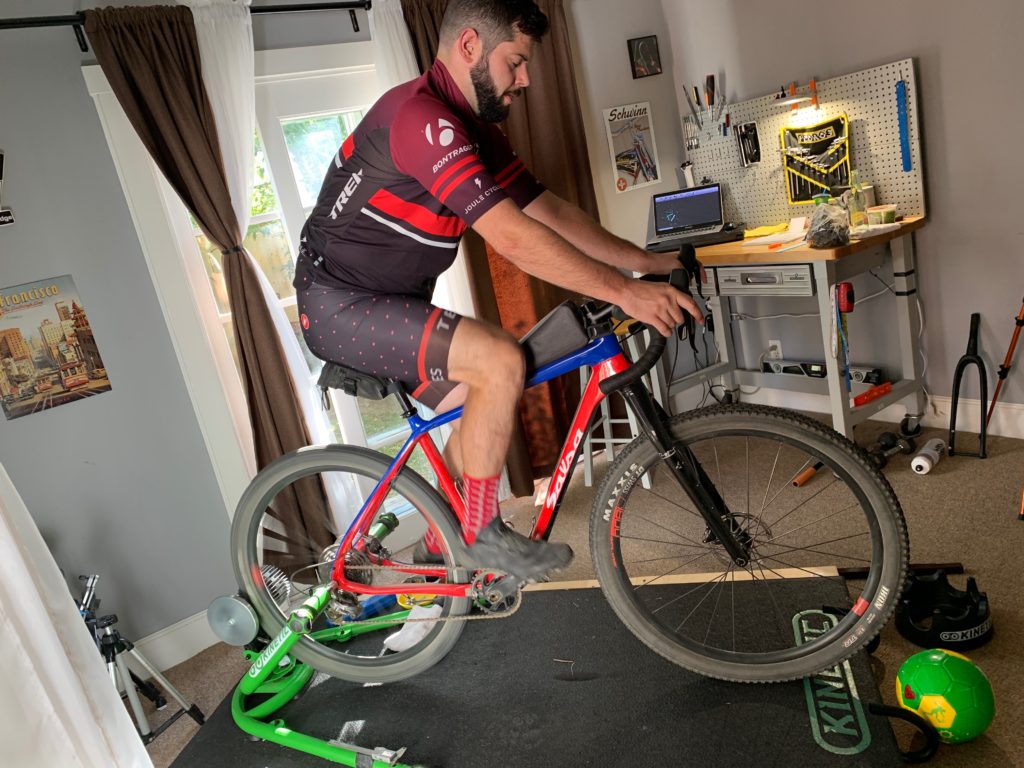
The athlete’s whose bike is featured the pic below was previously fit under my process – a process (in a nutshell) that includes measuring the leg, trunk and foot and then comparing those measurements to the geometry of the bike which results in a fit solution containing saddle height, saddle fore/aft, effective body extension cleat alignment and other variables like saddle tilt, handlebar angle, hood placement, shifter lever reach. With the solution in hand, it was time to examine the existing conditions of the bike and then start making changes.
Bike Data
- Brand: Salsa
- Model: Cutthroat
- Size: Large
- Year: 2019
- Notables: Fork axle to crown length is 483 (normal range is ~400mm)
Fit Data
- The first step is to check saddle fore/aft which in this case required a rather sizable adjustment. Based upon the athletes hip dismensions he needed to be 75 millimeters from centerline to saddle sweet spot and instead he had the saddle set at 65 millimeters from the centerline to saddle sweet spot.
- Fit Fact: misaligned saddle fore/aft can add too much pressure to the hands thus resulting in numbness and general discomfort.
- The next step is to check saddle tilt. The tilt was measured at +1 degree measured from the sweet spot of the saddle. Saddle tilt should be neutral or just below neutral so an adjustment was required and resulted in -1.5 degrees.
- The third step is to check Saddle height. The height was low causing the athlete to have too much bend in the knee which results in the athlete wanting to shift back in the saddle to generate more power. So I increased saddle height by 5 millimeters
- The fourth step is to check effective body extension which was a spot on so no adjustment was necessary.
- The fifth was to configure headset spacers and or above horizontal alignment (bar drop). COnsidering the length of the fork and intent of the bike I wanted to set the spacers so that the handlebar was neutral with the saddle height. This setting allows for comfort and a more relaxed torso angle.
- Next, I assessed the hoods and bar angles – in this case, the hood was too upright causing the wrists to bend so I moved them down and correlated the 10-degree bar angle at the same time.
- Last I double-checked the athlete’s cleat positions. It is common for cross and mtb cleats to loosed this resulting in misalignment which can knee pain and potential long term damage. The left cleat came loose and the angel in which the cleat was positioned was causing a heal out position. THis was creating pain in the knee as the athlete is neutral to heal position so I readjusted and tightened down the bolts.
Conclusion
After a long warm-up on the trainer and multiple hard efforts, I was pleased with the athlete’s position on the bike. I asked the athlete for feedback and based on the changes made he felt that the knee pain was greatly reduced and that the increased saddle height helped create more power without the need to shift back in the saddle. The end result of the fit can be seen in the pic below.
